

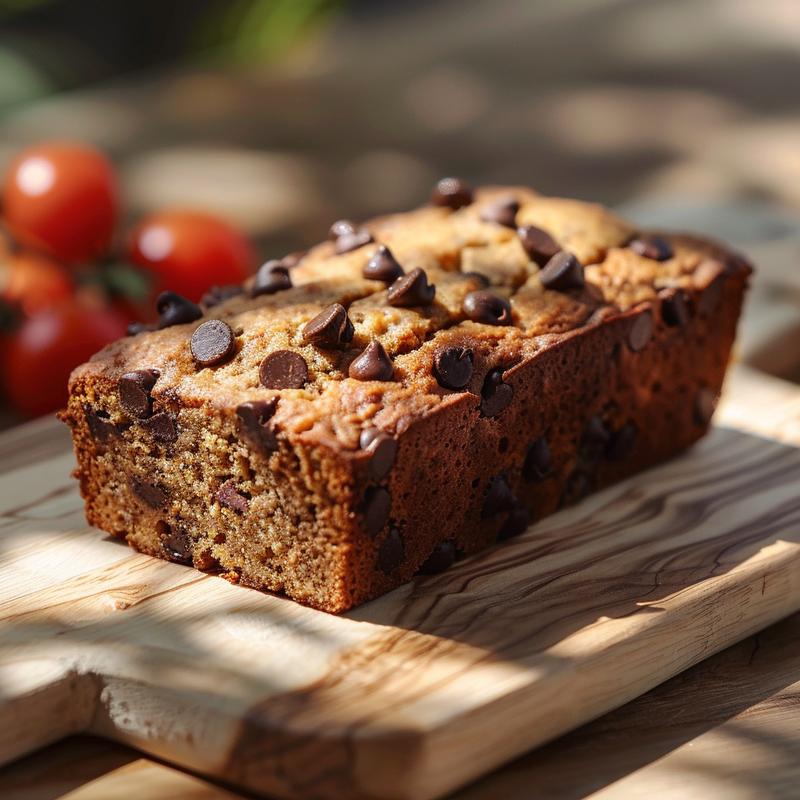
The Joy of Baking: Crafting Magical High Protein Banana Bread
Welcome, lovely bakers! Are you ready to embark on a delightful journey of flavor and nutrition? Today, we’ll be crafting a truly magical High Protein Banana Bread with Chocolate Chips! This recipe is more than just a treat; it’s a celebration of the sweet moments in life, perfect for breakfast, snacks, or even dessert. With each bite, you’ll discover the magic of baking, where simple ingredients transform into something extraordinary. Let’s sprinkle a little joy into our kitchens!
Why You’ll Love This Recipe
This High Protein Banana Bread is not just delicious; it’s packed with wholesome goodness and offers numerous benefits that will leave you swooning:
- High Protein Boost: With protein powder and Greek yogurt, this bread provides an excellent source of protein, perfect for fueling your day.
- Ripe Bananas: Using overripe bananas not only enhances the natural sweetness but also contributes to a moist and tender texture.
- Chocolate Delight: The rich dark chocolate chips create little pockets of joy that melt in your mouth!
- Easy to Make: This recipe is straightforward, making it perfect for bakers of all levels to enjoy the magic of baking.
- Versatile Treat: Enjoy it warm, toasted, or as a base for your favorite spreads—this banana bread is wonderfully adaptable!
Ingredient Breakdown
Let’s gather our ingredients and get to know each one a little better. Here’s what you’ll need for this lovely creation, along with some delightful substitutions:
- 3 ripe bananas: The riper, the better! They should be well-spotted for maximum sweetness.
- 1/2 cup Greek yogurt: This adds protein and moisture. You can substitute it with applesauce for a dairy-free version.
- 2 large eggs: These help bind the ingredients together. For a vegan option, try flax eggs (1 tablespoon flaxseed meal + 2.5 tablespoons water = 1 egg).
- 1/4 cup honey or maple syrup: Sweeten your bread naturally. Use maple syrup for a vegan alternative.
- 1 teaspoon vanilla extract: A splash of vanilla adds warmth and depth to the flavor.
- 1 cup whole wheat flour: This adds fiber and nutrients. All-purpose flour works too if you prefer a lighter texture.
- 1 cup rolled oats: These lend a delightful chewiness. Instant oats can be used in a pinch.
- 1 scoop protein powder: Vanilla or chocolate protein powder will work wonderfully here.
- 1 teaspoon baking powder: This helps the bread rise beautifully.
- 1/2 teaspoon baking soda: A little boost for extra fluffiness.
- 1/2 teaspoon salt: Balances the sweetness and enhances flavor.
- 1/2 cup dark chocolate chips: Because who can resist a mouthful of rich chocolate?
Step-by-Step Instructions
Let’s bring this magical banana bread to life! Follow these simple steps to create your delicious masterpiece:
- Preheat the oven: Preheat your oven to 350°F (175°C) and grease a 9×5 inch loaf pan to prevent sticking.
- Mix wet ingredients: In a large bowl, mash the ripe bananas. Add Greek yogurt, eggs, honey (or maple syrup), and vanilla extract. Mix until well combined.
- Combine dry ingredients: In another bowl, whisk together whole wheat flour, rolled oats, protein powder, baking powder, baking soda, and salt until mixed evenly.
- Combine wet and dry: Gradually add the dry ingredients to the wet ingredients, stirring gently until just combined. Be careful not to overmix!
- Fold in chocolate chips: Gently fold in the dark chocolate chips, ensuring they’re evenly distributed throughout the batter.
- Pour into the pan: Pour the batter into the prepared loaf pan and smooth the top for an even bake.
- Bake to perfection: Bake for 45-55 minutes, or until a toothpick inserted into the center comes out clean. The magic is happening!
- Cool and enjoy: Allow the bread to cool in the pan for 10 minutes before transferring it to a wire rack to cool completely. Then slice, serve, and enjoy!
Pro Tips for Perfect Banana Bread
To ensure your banana bread turns out perfectly every time, here are some expert insights:
- Use overripe bananas: They add more sweetness and moisture to your bread.
- Don’t overmix the batter: Mixing just until combined keeps your bread tender and fluffy.
- Experiment with spices: A dash of cinnamon or nutmeg can elevate the flavor profile beautifully.
- Check for doneness: Ovens can vary, so check your bread a few minutes before the recommended time.
- Let it cool: Allow your bread to cool completely before slicing for the best texture.
- Try different add-ins: Consider adding nuts, seeds, or dried fruits for a delightful twist.
- Store properly: Keep your banana bread in an airtight container to maintain freshness.
- Toast for a treat: Toast slices for a warm, crispy edge—perfect for breakfast!
Common Mistakes and Troubleshooting
We all make mistakes in the kitchen, and that’s part of the fun! Here are some common pitfalls and how to avoid them:
- Bread is too dense: This may happen if you overmix the batter or use too much flour. Measure carefully!
- Bread is dry: Ensure your bananas are ripe and that you don’t bake it for too long.
- Not enough sweetness: If your bananas aren’t very ripe, consider adding a bit more honey or maple syrup.
- Chocolate chips sink: Toss them in a bit of flour before folding them in to help them stay suspended in the batter.
- Crust is too hard: Cover the bread with foil halfway through baking to prevent over-browning.
Delightful Variations
Want to switch things up? Here are some fun variations to try:
- Nutty Banana Bread: Add 1/2 cup of chopped walnuts or pecans for a delightful crunch.
- Coconut Magic: Stir in 1/2 cup of shredded coconut for a tropical twist.
- Berry Bliss: Fold in 1/2 cup of blueberries or raspberries for a fruity surprise.
- Peanut Butter Swirl: Add a few dollops of peanut butter to the batter before baking for a nutty flavor.
Storage and Make-Ahead Instructions
Want to enjoy your banana bread over several days? Here’s how to store and prepare it ahead of time:
- Room Temperature: Store in an airtight container at room temperature for up to 3 days.
- Refrigerator: Keep it in the fridge for up to a week for longer freshness.
- Freezing: Wrap slices in plastic wrap and place them in a zip-top bag. Freeze for up to 3 months! Just thaw at room temperature before enjoying.
- Make-Ahead: You can prepare the batter a day in advance and store it in the fridge before baking. Just give it a gentle stir before pouring it into the loaf pan.
Frequently Asked Questions
Here are some common questions to help you on your baking journey:
- Can I use other flours? Yes! Almond flour or oat flour can be used, but adjustments may be needed for liquid.
- How can I make it gluten-free? Substitute with a 1:1 gluten-free flour blend, ensuring it has xanthan gum for the right texture.
- What if my bananas are not very ripe? You can bake them at 300°F (150°C) for 15-20 minutes until they are soft and sweet.
- Can I skip the protein powder? Yes, but the texture may change slightly. You can substitute with more flour or oats.
- How do I know when it’s done? A toothpick inserted into the center should come out clean or with a few moist crumbs.
- Can I add other flavors? Absolutely! Experiment with spices like cinnamon or cardamom to create unique flavor profiles.
- Is it okay to double the recipe? Yes! Just be mindful of your baking time, as it may take longer in a larger loaf.
- What can I serve with it? It pairs beautifully with butter, nut butter, or even a spread of cream cheese!
Nutritional Tips and Dietary Adaptations
This banana bread is not just a treat; it’s a wholesome choice! Here are some tips to adapt it to various dietary needs:
- Vegan option: Replace eggs with flax eggs and Greek yogurt with applesauce.
- Lower sugar: Reduce the amount of honey or maple syrup, or use a low-calorie sweetener if desired.
- High fiber: Add ground flaxseeds or chia seeds to boost fiber content.
- Low-carb option: Use almond flour instead of whole wheat flour for a lower-carb version.
Essential Equipment for Your Baking Adventure
Before we wrap up, let’s ensure you have the right tools to make this recipe a breeze:
- 9×5 inch loaf pan: The perfect size for an even bake.
- Mixing bowls: A set of different sizes will help with ingredient separation.
- Measuring cups and spoons: Accurate measurements are key to baking success!
- Whisk: For combining dry ingredients seamlessly.
- Rubber spatula: Great for folding in ingredients and scraping down the sides of the bowl.
Serving Suggestions
Now that your magical High Protein Banana Bread is ready, how will you serve it? Here are some delightful ideas to enjoy this delicious creation:
- Warm and Toasted: Enjoy slices toasted with a pat of butter or nut butter for a comforting breakfast.
- Top with Fresh Fruit: Add sliced bananas or berries for a fresh twist.
- Indulgent Treat: Drizzle with melted dark chocolate or a sprinkle of powdered sugar for a dessert-like experience.
- Pair with Coffee or Tea: A warm slice alongside a cup of your favorite brew is pure bliss!
Thank you for joining me on this delightful baking adventure! I hope you find the magic in every slice of your High Protein Banana Bread with Chocolate Chips. Remember, baking is all about joy and creativity. So grab your apron and let’s celebrate the sweetness together!


High Protein Banana Bread with Chocolate Chips
Ingredients
Method
- Preheat oven to 350°F (175°C) and grease a loaf pan.
- Mix mashed bananas, Greek yogurt, eggs, honey, and vanilla until combined.
- Whisk together flour, oats, protein powder, baking powder, baking soda, and salt.
- Combine dry and wet ingredients; fold in chocolate chips.
- Pour batter into pan, bake for 45-55 minutes, cool before serving.
Notes
Loved this recipe? Save it to your favorite Pinterest board so you can easily find it later! ✨
