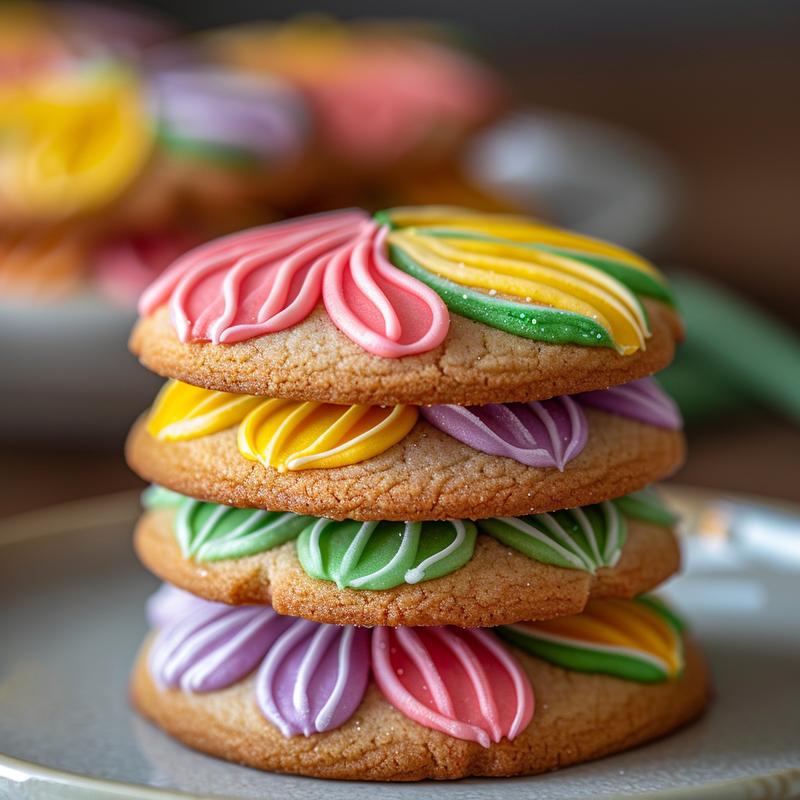
Cookie Tulip Fields: A Blooming Masterpiece on a Sugar Canvas
Hello, my fellow culinary artists! Today, we embark on a journey to craft something truly special – Cookie Tulip Fields. Imagine transforming a simple sugar cookie into a vibrant tableau of spring, a miniature garden bursting with color and joy. This isn’t just about baking; it’s about creating edible art that will impress and delight. Get ready to elevate your cookie decorating skills and produce share-worthy masterpieces that capture the essence of springtime beauty. This recipe does not currently have any complicated steps. We will guide you through it all!
Why You’ll Love This Cookie Tulip Fields Recipe
These aren’t just any cookies; they’re a statement. They’re a way to express your creativity and bring a touch of whimsy to any occasion. Here’s why you’ll fall in love with making them:
- Visually Stunning: The vibrant colors and delicate tulip designs make these cookies a feast for the eyes.
- Impressive Yet Approachable: While they look intricate, this recipe is designed to be accessible for bakers of all skill levels.
- Perfect for Gifting: Imagine the joy of presenting a beautifully arranged box of these cookie tulip fields to friends and family.
- A Creative Outlet: Unleash your inner artist and experiment with different color combinations and tulip designs.
- Celebrates Spring: Nothing says ‘spring is here’ like a field of tulips, and these cookies capture that feeling perfectly.
Ingredients You’ll Need to Craft Your Cookie Tulip Fields
The beauty of this recipe lies in its simplicity. You likely have many of these ingredients already in your pantry. Here’s what you’ll need to bring your cookie tulip fields to life:
- Sugar Cookie Dough: Pre-made or homemade. If you’re short on time, store-bought dough works perfectly. If you want the full culinary experience, consider making your own from scratch.
- Royal Icing: The magic ingredient! You’ll need white royal icing, which you’ll then divide and tint into various colors.
- Gel Food Coloring: Red, yellow, pink, purple, and green. Gel food coloring provides the most vibrant and concentrated colors.
- Piping Bags or Squeeze Bottles: These are essential for precise decorating.
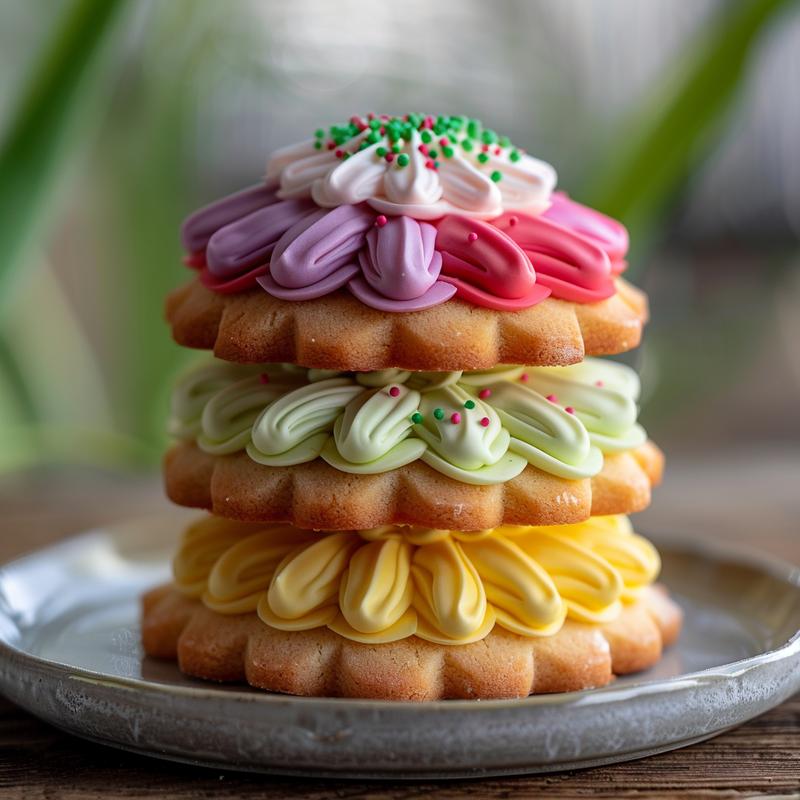
- Edible Green Sprinkles (Optional): To add a touch of ‘grass’ at the base of your tulip field.
- Water: For thinning the royal icing to the perfect consistency.
Crafting Your Cookie Tulip Fields: Step-by-Step
Now for the fun part! Follow these steps to create your own stunning cookie tulip fields:
- Bake Your Sugar Cookies: If using homemade dough, follow your recipe instructions. If using store-bought, follow the package directions. Let the cookies cool completely on a wire rack.
- Prepare Your Royal Icing: Divide the royal icing into separate bowls, one for each color you’ll be using (red, yellow, pink, purple, green).
- Tint Your Icing: Add a few drops of gel food coloring to each bowl and mix well until you achieve your desired shade. Remember, a little goes a long way with gel food coloring!
- Thin the Icing: This is crucial for achieving a smooth, even flood. Add water, a few drops at a time, to each bowl of icing, mixing until it reaches a flood consistency – similar to thick glue. When you lift a spoonful of icing, it should slowly drizzle back into the bowl and smooth out within a few seconds.
- Transfer to Piping Bags: Fill each piping bag or squeeze bottle with its corresponding color of icing.
- Outline the Tulips: Using one color of icing, carefully outline a tulip shape on each cookie. Don’t worry about perfection; tulips in nature are never perfectly uniform!
- Flood the Tulips: Fill in the outlined tulip shape with the same color icing. Use a toothpick or scribe tool to gently spread the icing evenly and pop any air bubbles.
- Repeat with Different Colors: Create a vibrant field of tulips by repeating steps 6 and 7 with different colors of icing on each cookie. Overlap the colors slightly for a more natural look.
- Add Green Sprinkles (Optional): If desired, sprinkle edible green sprinkles at the bottom of the cookie to represent grass.
- Let Dry Completely: This is the most important step! Allow the icing to dry completely before serving or packaging the cookies. This may take several hours, or even overnight.
Pro Tips for Perfect Cookie Tulip Fields
To truly elevate your cookie decorating game, consider these pro tips:
- Use a Scribe Tool: A scribe tool (or even a toothpick) is invaluable for spreading the icing evenly and popping air bubbles.
- Practice Your Piping: Before decorating your cookies, practice piping on a piece of parchment paper to get a feel for the icing consistency and pressure.
- Work in Batches: If you’re making a large batch of cookies, work in smaller batches to prevent the icing from drying out.
- Use a Turntable: A turntable can make it easier to decorate your cookies evenly.
- Don’t Overmix the Icing: Overmixing can incorporate too much air into the icing, making it difficult to work with.
Common Mistakes to Avoid
Even experienced bakers can make mistakes. Here are a few common pitfalls to avoid when making cookie tulip fields:
- Icing Too Thick or Too Thin: Achieving the correct icing consistency is crucial. Too thick, and it will be difficult to spread. Too thin, and it will run off the cookie.
- Not Letting the Icing Dry Completely: This can lead to smudging and a messy final product. Be patient!
- Overcrowding the Cookies: Give each tulip enough space to shine. Don’t overcrowd the cookie with too many colors or designs.
- Using Too Much Food Coloring: Too much food coloring can alter the taste and texture of the icing. Start with a small amount and add more as needed.
- Not Cooling the Cookies Completely: Decorating warm cookies will cause the icing to melt and run.
Variations to Inspire Your Creativity
The beauty of this recipe is that it’s a blank canvas for your creativity. Here are a few variations to inspire you:
- Different Flower Shapes: Experiment with other flower shapes, such as roses, daisies, or sunflowers.
- Ombre Effect: Create an ombre effect by gradually lightening or darkening the icing color as you flood each tulip.
- Add Texture: Use a textured rolling pin to create a subtle pattern on the sugar cookie dough before baking.
- Edible Glitter: Add a touch of sparkle with edible glitter.
- Bunny Accents: For Easter, add mini bunny-shaped sprinkles or icing details.
Storing Your Cookie Tulip Fields
To keep your cookie tulip fields fresh and beautiful, store them properly:
- Airtight Container: Store the cookies in an airtight container at room temperature.
- Layer with Parchment Paper: If stacking the cookies, layer them with parchment paper to prevent sticking.
- Avoid Humidity: Store the cookies in a cool, dry place away from humidity.
- Do Not Refrigerate: Refrigerating the cookies can cause the icing to become sticky.
- Shelf Life: Properly stored, these cookies will stay fresh for up to a week.
Frequently Asked Questions About This Recipe
Here are some common questions about making cookie tulip fields:
- Can I use store-bought sugar cookie dough?: Absolutely! Store-bought dough is a great time-saver.
- Can I make the royal icing ahead of time?: Yes, you can make the royal icing a day or two in advance and store it in an airtight container in the refrigerator. Bring it to room temperature and re-whisk before using.
- Can I freeze the cookies?: Yes, you can freeze the undecorated cookies. Wrap them tightly in plastic wrap and then place them in a freezer-safe bag or container. Thaw completely before decorating.
- What if my icing is too thick?: Add a few drops of water at a time, mixing until you reach the desired consistency.
- What if my icing is too thin?: Add a small amount of powdered sugar, mixing until you reach the desired consistency.
Serving Suggestions: Showcase Your Edible Art
These cookie tulip fields are more than just a treat; they’re a work of art. Here are some serving suggestions to showcase their beauty:
- Cookie Bouquet: Arrange the cookies in a vase or basket to create a stunning cookie bouquet.
- Gift Boxes: Package the cookies in beautiful gift boxes to give as presents.
- Dessert Table Centerpiece: Use the cookies as a centerpiece on a dessert table.
- Party Favors: Individually wrap the cookies and give them as party favors.
- Afternoon Tea: Serve the cookies with a pot of tea for a delightful afternoon treat.
This recipe does not currently have your personal touch added. Remember, baking is about expressing yourself! Don’t be afraid to experiment with colors, designs, and flavors to create cookie tulip fields that are uniquely yours. Eat your heart out, and enjoy the process of creating these beautiful, share-worthy treats! I hope you find your books helpful.

Cookie Tulip Fields
Ingredients
Method
- Bake sugar cookies; let cool.
- Divide icing; tint with colors.
- Thin icing to flood consistency.
- Transfer icing to piping bags.
- Outline tulip shape on cookie.
- Flood tulip with icing; spread evenly.
- Repeat with different colors.
- Optional: Add green sprinkles for grass.
- Let icing dry completely.
Notes
Loved this recipe? Save it to your favorite Pinterest board so you can easily find it later! ✨